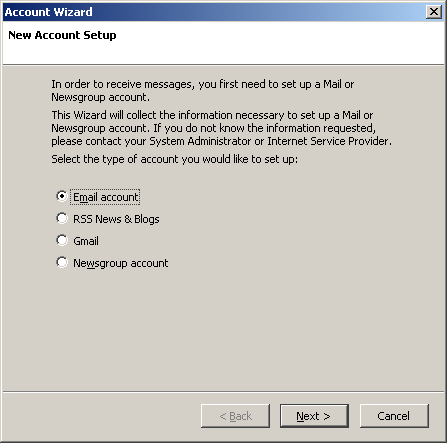
Click the Add Account button.
Select Email account.
Click Next to continue.
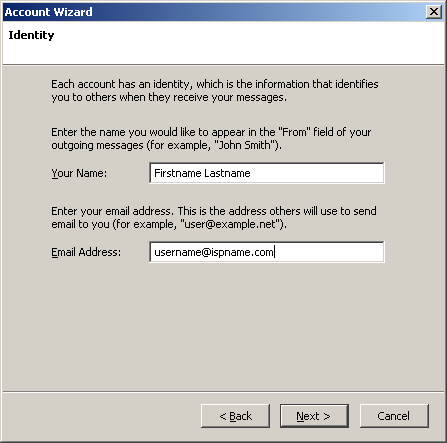
Your Name = Enter your name.
Email Address = Enter the e-mail address of the account. (username@ispname.com)Click Next to continue.
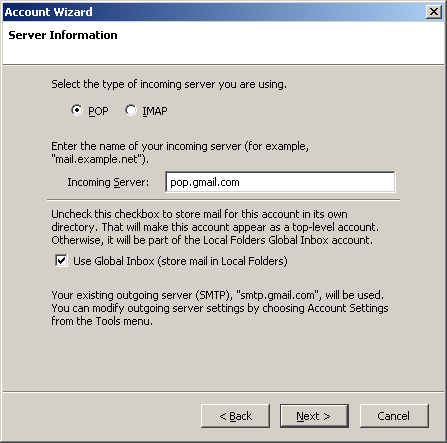
Select POP.
Incoming Server = The Incoming (POP3) mail server: pop.gmail.com
Click Next to continue.
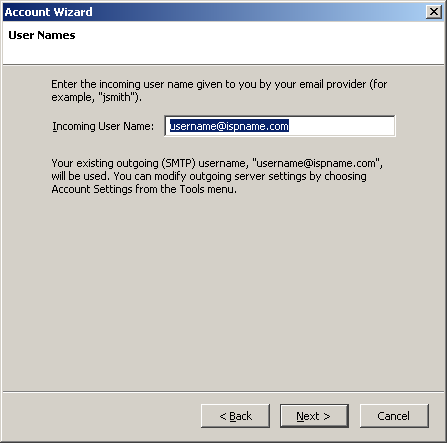
Incoming User Name = Enter your full e-mail address. (username@ispname.com)
Click Next to continue.
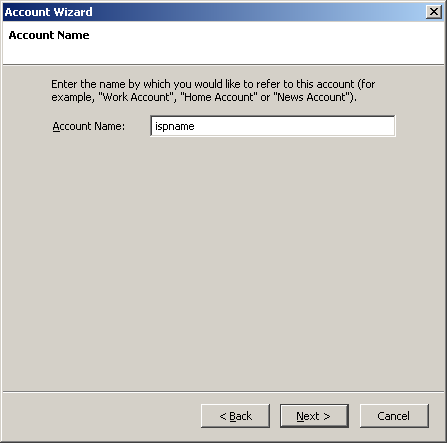
Account Name = Enter a name for the account.
Click Next to continue.
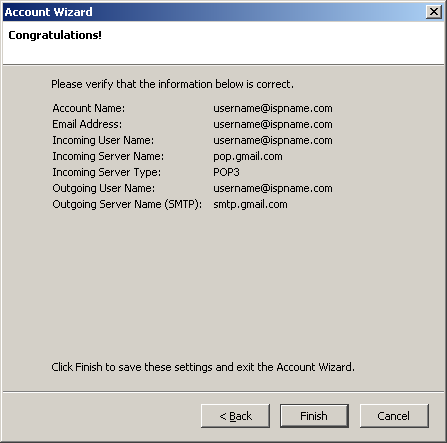
Review the information you entered. Click Back to change any erroneous information.
Click Finish to complete the wizard.
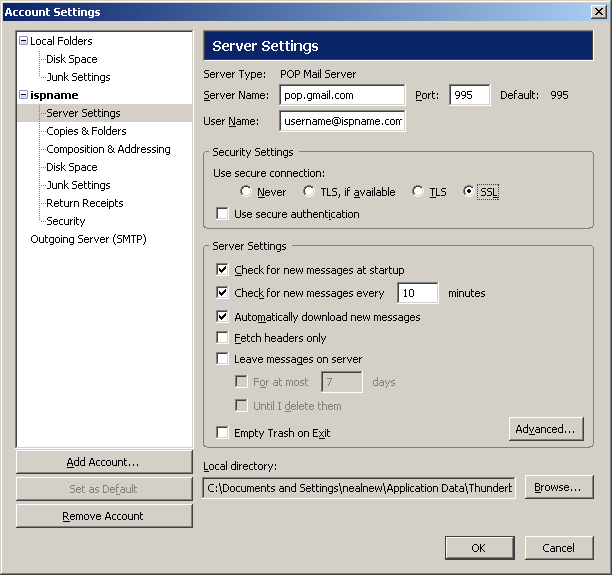
In the left column, highlight Server Settings.
Server Settings:
Server Type = This should be a POP Mail Server.
Server Name = pop.gmail.com
User Name = Enter your full e-mail address. (username@ispname.com)
Port = This should be the default setting: 995.
Under "Use secure connection" select SSL
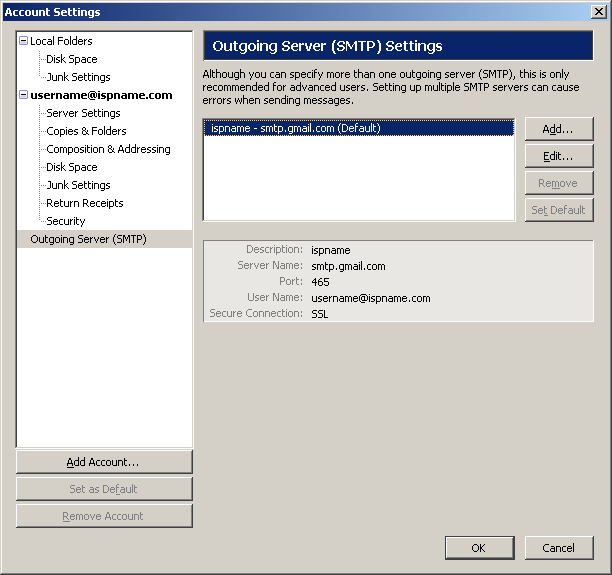
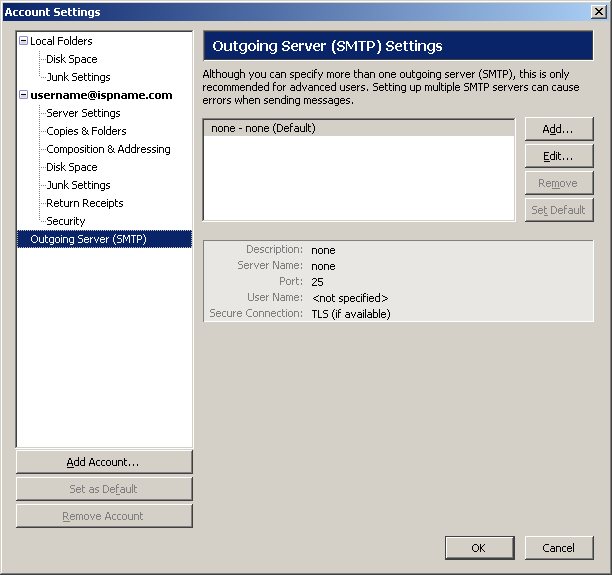
In the left-hand column, highlight Outgoing Server (SMTP).
Outgoing Server (SMTP) Settings:
Important: SMTP authentication is required to send e-mail and without this enabled, you cannot send e-mail.
To the right, highlight the account you'd like to edit and click the Edit button.
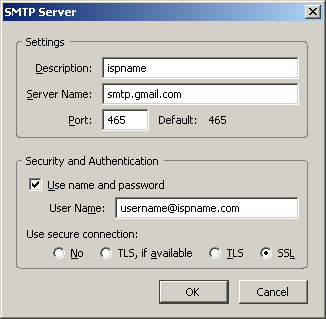
SMTP Server:
Server Name = smtp.gmail.com
Port = 465
Check the box Use name and password.
User Name = Enter your full e-mail address. (username@ispname.com)
Under "Use secure connection" select SSL
Click OK to close the window and save the changes.
Click OK.